Saturday, August 30, 2008

Changing Sump Pumps


When we moved into this house four years ago, two holes in the concrete housed pedestal sump pumps, and another sewer pump was in a covered basin in the basement bathroom. I have since dug the two sump reservoirs down two feet and installed proper basins. In one, I changed the pedestal pump for two submersible pumps. The pedestal went to the second basin so there was a back up there. Over a year ago the older one (1950's?) overheated and has been unplugged since. I bought a submersible pump to replace the other pedestal pump, and later received another submersible from Ralph.

Today I finally installed the submersibles in the second sump. All the same fittings were used so it went fairly smoothly, although hot work in a corner of the basement, bending over a hole in the closet. I have yet to buy a proper cover for it, so it just has a trash can lid sitting over the hole now.
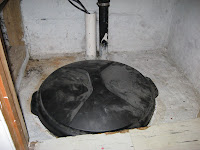
I prefer the submersible pumps because they are cooled in the water and don't overheat, whereas the pedestal pumps need air circulation and overheated because I covered them. I want them covered to keep radon from coming into the house, and to control the humidity, and for safety.
I'm glad that's over. Now I don't have to worry about the basement flooding because the pumps are old.

Thursday, August 28, 2008

Back to School Labeling


Back to School Labeling, August 28, 2008


Be sure to put your child's name on all their school supplies. That's what they say. But such a long list of supplies! And what's with the requirement of sharpened pencils? It took me nearly three hours to label, sharpen and organize this years' batch of stationery supplies.

Interesting items. One first grader is required to supply a box of baby wipes and a bottle of hand sanitizer--germ control at its finest. Maybe the bathroom sinks and soap dispensers are out-of-order at that end of the building this year? The junior higher needs two packets of lined paper and two packets of pens—just for English. That's more paper than he's used in his whole school career before now. Who knows, maybe this year, he'll conquer his writer's block and write the next Eragon. Then there are the boxes of tissues-- none for the first graders, two boxes for the middle schooler, three large boxes for the junior higher. The bigger they are, the snottier they get???

Anyway, the supplies are all boxed and ready to go.

I'll admit it, I have drawers full of spare supplies yet at home. Just can't resist those amazing back to school sales on stationery.

--Danger, Mum Working.

Monday, August 25, 2008

Making a Linchpin


August 25, 2008

A couple of months back, we got an Ariens lawn tractor off freecycle. It has a 15 hp Briggs and Stratton engine, and 42 inch mowing deck. Tyres and everything are good, but it moved forward a little, then stopped. Finally I figured out the problem. The engine bolts had rattled loose or off, which meant that the whole engine moved and took the tension off the drive belt.
A couple of days ago we picked up a trailer/cart for the tractor, also from a person on freecycle. We were planning to make a trailer anyway because the kids had decided to use it for hayrides during harvest season. So now we have a ready made trailer, also with good tyres and in working order. The only thing missing was the pin to connect the two. A nail worked for a while (actually D came up with a 1938 date nail from a railway sleeper), then I made a pin on the forge.

The stock was an old bicycle pedal arm (one piece with pedals attaching directly - no cotter pins). I had already started to make this into a ring so I opened it out, drew it down, cut excess off, bent a loop for a handle (and stop), and punched a hole. The punching went really well considering I haven't done much. I used a hot punch I made from the coil spring. Since I don't have an anvil, I punched it over a piece of steel that someone had blown a hole in with a gas torch.


The pin is only a small piece, but that bit of ironmongery is the linchpin of the whole system!

Friday, August 22, 2008

Making a Screwdriver


August 22, 2008

We had our first attempt at making a screwdriver last week. Both girls made one. Somehow I was deprived of the privilege of making one in high school, even though it seems to be a common project. We must have been making other things (I remember a perspex container for paperclips, a plumb bob turned on the lathe, a drawing table and chair - I still have the table, maybe dad still has the plumb bob).

We started with the handle. J made hers out of a piece of firewood that we picked up around the corner. It was a small branch, but too thick, so we hacked it down to size with the hatchet, then she sanded it while holding it in the vise. I drilled a pilot hole in it to receive the tang of the screwdriver (2mm). A made hers from an old crib bar, which she cut herself with a coping saw while holding the piece in the vise.

The blade we made from an old coil spring, straightened out in the forge, then drawn down for the tang, and likewise for the blade. The whole thing had to be drawn down because it was too thick. We didn't take the hardening very seriously - this is our first try, a prototype. We heated it up and the girls both wanted to quench their own. Then we heated the tang and I pushed it into the handle which was in the vise. A little wax as it cooled to keep the rust away, then I ground the ends of the blades on the bench grinder.

Both the vise and bench grinder were gifts from Ralph O. when he moved to Florida. The forge came from freecycle, and the anvil is just a bit of railway iron on a stump of black locust (that we cut down from our backyard).

We're quite pleased with the result. Now the boys want a "turn" at making theirs.


A's screwdriver: